Waxing your eyebrows is a common technique to maintain a well-groomed appearance, with many opting for professional waxing services or doing it yourself regularly. Home waxing can be intimidating, but it doesn't have to be. Armed with information, the proper equipment, and a systematic approach, you'll find that waxing your eyebrows is a breeze and a liberating experience.
This blog post will cover everything you need to know to have perfect brows every time, from choosing the best wax to properly prepping your skin. Eyebrow shaping needs no longer be a difficult duty; instead, you may treat yourself by taking this time to focus on your appearance. Ready? All right let's get this party started.
What Is Eyebrow Waxing?
Waxing the eyebrows is a fast and effective approach to removing unwanted hair. First, the unwanted hairs are covered with warm or cold wax and then removed. Next, you press a paper- or cloth-like strip onto the waxed area and peel it off. To get the look you want, the stylist will only remove the hairs that aren't covered by wax.
The Basic Brow Shapes You Should Be Aware Of Before Waxing Your Brows
There are standard shapes to choose from. It's fine to have a goal in mind for the shape of your hair, but this is just a sliver of hair on your face. A stylist cannot perform miracles and make hair grow where there is none. Thus, it is recommended that you follow the stylist's lead since they will better understand what can be done and what will look well on your face.
Shape 1: Sharp-Angled Brows
Here, the brow is shaped like an inverted V. Because of the angle's steepness, a bold form is formed just above the observer's sight. Those who have fuller faces and want to add some definition to their features should consider this. It's easy to look perpetually shocked, so let the stylist guide you. Looking for eyebrow feathering salon? Look no further,Cosmetic Tattoo by Rach got you covered.
Shape 2: Round Brows
The round brow is characterised by a smooth, continuous curve that is slightly more prominent in the centre of the forehead than at its extremities. The sharp angles of a square face make this a terrific style for you to try out. It can help bring the features of the face into harmony.
Shape 3: S-Shaped Brows
An S-shaped brow has two curves: an inward upturn in the middle and an outward curve at the ends. Waxing can bring beautiful curves to someone's brows, but this shape is best for those whose brows already have this form.
Shape 4: Flat Brows
One of the most powerful silhouettes is almost perfectly straight, with only a hint of a bend at the very end. This works effectively for people with long, oval faces to avoid having a longer face.
Shape 5: Soft-angled brows
If your brows are gently angled, they resemble an inverted V rather than a curve. This makes a face look more angular while keeping the softer features around the eyes. Raising the arch might make it appear even longer if your face is long or oval. An arch with a gentle angle is ideal for those with a heart-shaped face to emphasise the allure of your top face.
What Are The Eyebrow Waxing Procedures?
Step 1: Heat Your Wax
If you're using wax, whether soft or hard, you'll need to place it in the warmer and let it warm up for a while before you can use it. Once the wax has melted completely, you may need to turn down the warmer's heat slightly to achieve the desired honey-thick consistency.
Step 2: Cleansing
Clear your face of all makeup and oils as the wax heats up. Wax may not adhere well to the hair if these are present. The time has come to apply the pre-wax gel you purchased with one of the kits.
Use a cotton swab to spread the gel over your brows and the skin in between and around them (Basically everywhere you go, you wax). This additional washing procedure ensures a good wax and can prevent irritation and post-wax pimples by better preparing your skin.
Step 3: Trim The Brows
Brush the hairs on your brows upward with the spoolie. Next, snip off the longer hairs, so they're all the same length. To begin, select a little section of hair and cut it.
If you want a sloppy, uneven look, only panic and shave off all your hair at once. Each hair can be handled separately. It's important to avoid cutting into the area between the brows at all costs when trimming.
Step 4: Measure Your Brows
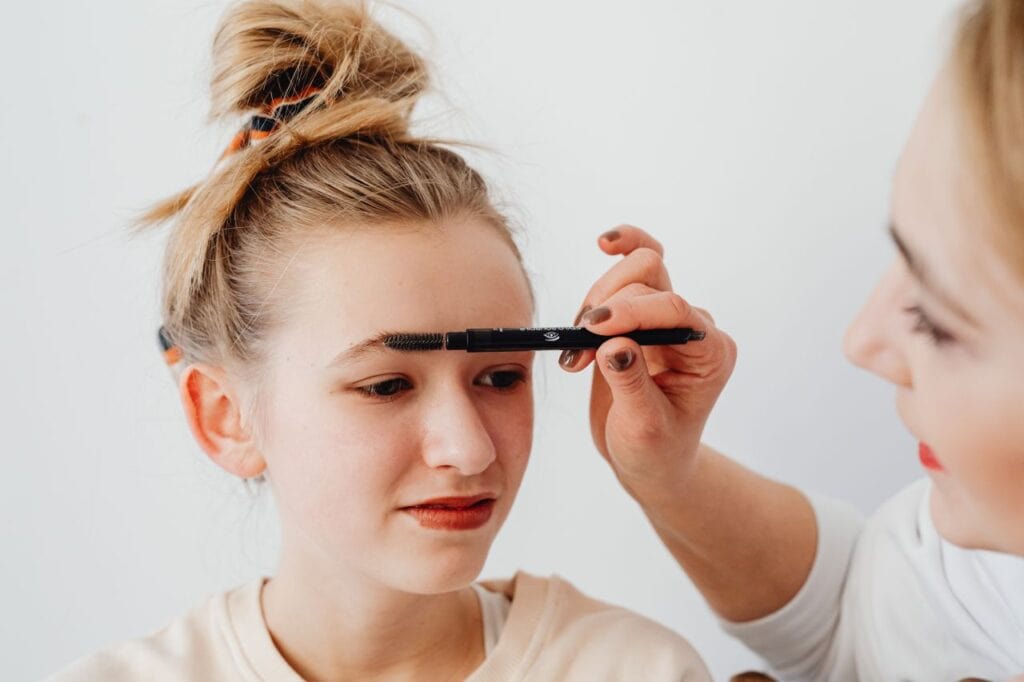
Measuring and defining your brows isn't as difficult as it may appear; with practice, you'll find it's a breeze! By using a ratio called "The Golden Ratio," we can tailor the contour of our brows to our features.
One of the wooden implements should be positioned such that it begins at the inner corner of your eye and travels up the centre of your nose to the beginning of your brow. Your brow hairs should start here. Marking this line with your brow pencil can help determine how much hair to remove during the waxing or if any removal is necessary.
The next step is to determine where our brow ends. Take the wooden implement and run it under your eye, through your brow bone, and out through the end of your nose until you reach the exact spot you started at.
Last but not least, whilst staring straight ahead, place the applicator across the centre of your iris to locate your arch. Your arch is where the eyebrow pencil or pen meets your brow.
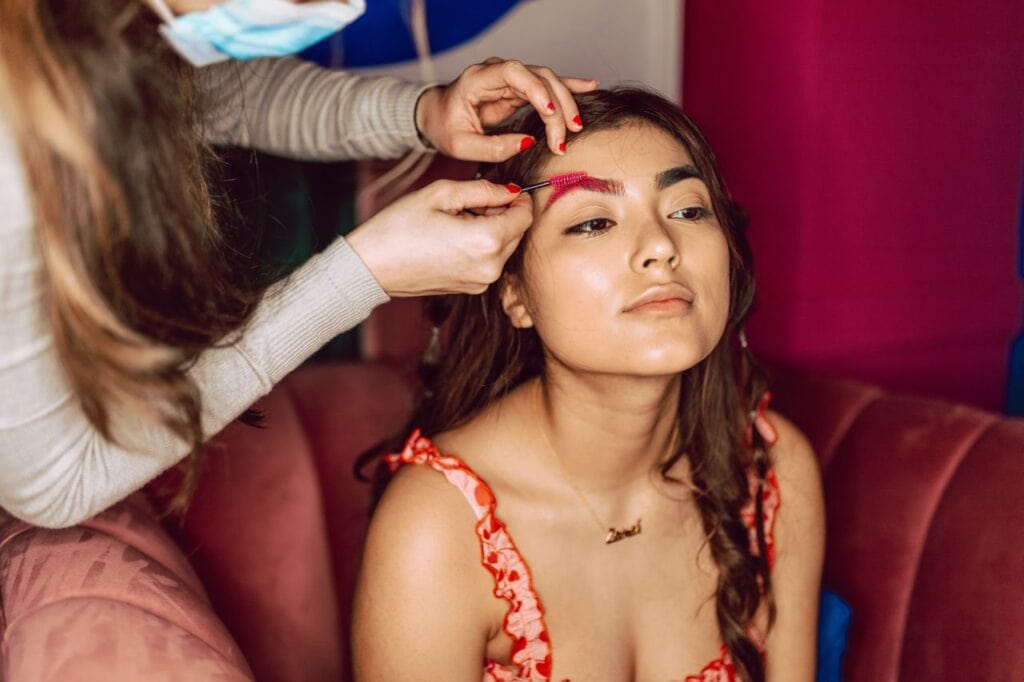
Step 5: Apply Your Wax
It would be best if you started by applying a little layer of wax under your eyebrow, following the outline you made. You can always get rid of more hair, but you can't grow it, so start with a low-maintenance style. While using wax, whether soft or hard, it is best to apply it in the direction of hair growth and remove it against the grain.
Step 6: Tweeze And Touch Up
After you have waxed the underside, in between, and on top of your brows, you should use tweezers to remove stray hairs. Keep in mind that you should only pluck one hair at a time and check the shape and evenness of your brow in contrast to the opposite side after nearly every pluck to keep things matching properly.
Step 7: Apply Waxing Post-Care Lotion/Gel/Oil
Use a clean cotton swab to spread the after-waxing product of your choice from your wax package all over the waxed areas to cleanse and soothe them. And there you have it! After reading your step-by-step instructions on waxing eyebrows, we hope you feel more prepared to give it a shot.
FAQs About Eyebrow Waxing
The temperature required to melt this substance is not high enough to kill these microorganisms, even if it is required to melt the substance. Hence, the wax you use at home can be reused multiple times, but it can only be used on one person at a time. Therefore, if you live in a household with numerous wax people, keeping their wax supplies separate is in everyone's best interest.
When you get your eyebrows waxed, the hair that grows back will often be a little softer and thinner than before. If you continue to wax your eyebrows regularly, your thick and coarse eyebrow hairs will gradually disappear over time. Waxing helps the hair grow back into the form and direction you want it to grow in, in addition to increasing the thickness of the hair.
When you wax your brows, the hair that grows back is finer and softer. Your hair will grow back finer, softer, and less dense than before, which is very helpful for preventing hair from growing back in your eyebrows.
You are not allowed to take a hot shower or bath for at least 12 hours.
Waxing leaves your hair follicle open immediately after the procedure. Because of this, it is more likely to have hot water penetrate the open hair follicle when it is subjected to a shower or bath. This will aggravate the condition and make it more uncomfortable. After the follicles have stopped producing oil, you can resume your regular showering routine.
Damage to the skin that occurs as a result of waxing can manifest itself in various ways, including the sensation of burning, rashes and irritation, scaling of the skin, red lumps, or an increase in skin temperature. In addition, you will likely end up with ingrown hairs following a waxing operation; however, you won't be able to notice them for at least a week after the treatment.
Is Waxing Your Eyebrows Painful?
To sum up: maybe. It's not the most delicate skin area, so getting waxed here is more like an annoyance than a scream of pain. Because it only lasts for a split second, it's more accurately described as unpleasant than painful. When you continue to get your eyebrows waxed, the experience will become less uncomfortable for you. This is because subsequent visits will result in less hair needing to be plucked out due to the hair having thinned out.
Tweezing after waxing is more likely to cause severe discomfort than waxing itself. If you start plucking now, waxing will be a breeze afterwards. As you pluck, the individual hairs fall out in one long strand. Instead of dreading the wax-removal process, try to find some amusement in what an unusual feeling is usually just. Check out our range of microblading services to help with your problems.
You should also anticipate some redness in the skin following this. If you're going on a date, you should wax your eyebrows the day before or give yourself three days to be safe. In some cases, waxing might cause red lumps (folliculitis) that fade away a few days later.
For Beginners, How Do You Wax Your Eyebrows?
When you first start waxing your brows, you should take six essential steps: washing, measuring the brows, waxing, tweezing, trimming, and aftercare.
It's crucial to have everything you'll need already at home and ready to use before you begin. One of the worst things that can happen while using wax is running out of wax strips.
How Often Should Your Eyebrows Be Waxed? How Long-Lasting Is Eyebrow Waxing?
Waxing your brows once every few weeks is recommended. When one new hair develops in the eyebrow, generally after two weeks, you should expect two more to follow suit. You can delay your next waxing session by removing these fine hairs as soon as they develop with tweezers.
Every 4 to 6 weeks is a good target for waxing and tinting your eyebrows. If your brow is sparsely haired or the hairs are spread out in a noticeable pattern, you may get them tinted.
After Waxing Your Brows, What Should You Do?
After the waxing, your stylist will apply a soothing lotion to the area. This lotion could be aloe vera, witch hazel, or pure diluted lavender. The heat and redness should subside as a result.
For the next twenty-four hours, you should avoid using heavy lotions, makeup, or scented products in the area. If you want to avoid getting acne around your eyes, avoid touching them until after you've washed your hands. This will cause acne, which is something no one wants.
Swimming and tanning beds should also be avoided in the immediate aftermath, as your skin will be extremely sensitive. Waxing the skin also exfoliates it, which leaves it more vulnerable to sunburn as a result.
Is It Okay To Wax Your Eyebrows At Home? What Skills Are Required?
The process of waxing can be done in the comfort of your own home. Wax can be made at home by melting brown sugar, honey, and water together in a microwave. After applying it, you can use towel strips to remove the hair.
There are two different questions here: the first is whether or not you should wax at home, and the second is whether or not you should wax at home. Well, you might be a master at shaping the wax while inspecting the results in the mirror and then tearing it off with enough power to yank the hairs out of the follicles.
It would be wise to have someone else handle this to avoid the problem of working from a reflection. In addition, salon waxes are typically higher quality and more cost-effective than those found in homes.
Eyebrow Waxing Vs Microblading
To get the desired shape with the current hair, waxing should be done every six to eight weeks. As a result, your stylist will work to accentuate the brows' pre-existing structure by ensuring it's harmonious with your face. This necessitates regular maintenance, which may involve plucking the eyebrows occasionally between rounds of therapy.
Microblading lasts about two years. Close to the level of cosmetic tattooing but still needs to be quite there. Depending on your skin type and how well you care for it, it can last as long as three years. To have the stylist's creative input on the final form of the brow is a fantastic bonus. Microblading is a great option for those with sparse, hard-to-shape eyebrows because it involves applying colour over the current brow.
Eyebrow Waxing Vs Tweezing
Tweezers are still your best bet for well-groomed brows. Hairs are removed one by one or in relatively tiny batches. This results in a more polished overall appearance. Because a) it's simple to do it yourself and b) it causes less skin irritation than waxing, plucking is still a popular option. You need not worry about embarrassing red lumps or scars after a night of tweezing before a date.
Eyebrow Threading Vs Waxing
When you get your hair threaded, you use a thread to draw them out gently. It takes longer than waxing to remove the hair. Thus, it may be more unpleasant. A lot of people opt for threading instead of waxing because they believe it gives them better results in terms of precision. In addition, threading causes less irritation and damage to the skin. Waxing, on the other hand, is more popular because it takes less time and causes less discomfort overall. Check out eyebrow tattoo page which has everything you might need near you.
Conclusion
Many men and women wax their eyebrows in salons or at home to appear good. Waxing at home is OK. This post includes wax, skin prep, and beautiful brows. After waxing, the stylist will only shave visible hairs. The stylist's suggestion is superior to a regular silhouette.
The centre of a round brow has a continuous curvature. S-shaped faces have inward-bending brows. V-brows. Waxing can give brows great curves, but those born with them prefer it. Wash your face and apply pre-wax gel when the wax is heated. Gel your eyebrows with a cotton swab. Spool hair up and cut extra. Estimate eyebrow arch placement using "The Golden Ratio". Shave with a brow pencil. To start again, run the wooden item under your eye, past your brow bone, and out your nose. Waxing eyebrows is irritating but not painful.
Start with a low-maintenance trim, waxing in the direction of hair growth, and tweezing strays. To guarantee consistency, pluck one hair at a time and compare the brow's shape and evenness to the opposite side after almost every pluck. Clean and soothe waxed areas with a clean cotton swab and an after-waxing product from the wax packet. Tweezing hurts more than waxing, so laugh. Home eyebrow waxing prevents irritation.
Cleanse, measure, wax, tweeze, trim, and moisturise. After waxing, your stylist will apply a soothing lotion. Avoid using lotions, cosmetics, and scented products for 24 hours. Waxing exfoliates the skin, making it more sunburn-prone, so avoid swimming or tanning afterwards. Brown sugar, honey, and water can be microwaved to wax using towel strips. Salon waxes are superior and cheaper than home waxes. Waxing every 6–8 weeks shapes hair. Sparse, unruly brows benefit from microblading. Tweezers are also popular. Threading, faster and less painful than waxing, is popular.
Content Summary
- Waxing your eyebrows is a common technique to maintain a well-groomed appearance, with many opting for professional waxing services or doing it yourself regularly.
- Armed with information, the proper equipment, and a systematic approach, you'll find that waxing your eyebrows is a breeze and a liberating experience.
- This blog post will cover everything you need to know to have perfect brows every time, from choosing the best wax to properly prepping your skin.
- Waxing the eyebrows is a fast and effective approach to removing unwanted hair.
- It's fine to have a goal in mind for the shape of your hair, but this is just a sliver of hair on your face.
- The round brow is characterised by a smooth, continuous curve that is slightly more prominent in the centre of the forehead than at its extremities.
- The sharp angles of a square face make this a terrific style for you to try out.
- It can help bring the features of the face into harmony.
- An S-shaped brow has two curves: an inward upturn in the middle and an outward curve at the ends.
- Soft-angled brows If your brows are gently angled, they resemble an inverted V rather than a curve.
- Raising the arch might make it appear longer if your face is long or oval.
- An arch with a gentle angle is ideal for those with a heart-shaped face to emphasise the allure of your top face.
- Clear your face of all makeup and oils as the wax heats up.
- Use a cotton swab to spread the gel over your brows and the skin in between and around them (Basically everywhere you go, you wax).
- Brush the hairs on your brows upward with the spoolie.
- If you want a sloppy, uneven look, only panic and shave off all your hair at once.
- Marking this line with your brow pencil can help determine how much hair to remove during the waxing or if any removal is necessary.
- The next step is to determine where our brow ends.
- Take the wooden implement and run it under your eye, through your brow bone, and out through the end of your nose until you reach the exact spot you started at.
- Last but not least, whilst staring straight ahead, place the applicator across the centre of your iris to locate your arch.
- Your arch is where the eyebrow pencil or pen meets your brow.
- After waxing the underside, in between, and on top of your brows, you should use tweezers to remove stray hairs.
- Use a clean cotton swab to spread the after-waxing product of your choice from your wax package all over the waxed areas to cleanse and soothe them.
- After reading your step-by-step instructions on waxing eyebrows, we hope you feel more prepared to give it a shot.
- When you continue to get your eyebrows waxed, the experience will become less uncomfortable for you.
- Tweezing after waxing is more likely to cause severe discomfort than waxing itself.
- You should also anticipate some redness in the skin following this.
- If you're going on a date, you should wax your eyebrows the day before or give yourself three days to be safe.
- When you first start waxing your brows, you should take six essential steps: washing, measuring the brows, waxing, tweezing, trimming, and aftercare.
- Waxing your brows once every few weeks is recommended.
- Every 4 to 6 weeks is a good target for waxing and tinting your eyebrows.
- After the waxing, your stylist will apply a soothing lotion to the area.
- The process of waxing can be done in the comfort of your own home.
- There are two different questions here: the first is whether or not you should wax at home, and the second is whether or not you should wax at home.
- Well, you might be a master at shaping the wax while inspecting the results in the mirror and then tearing it off with enough power to yank the hairs out of the follicles.
- To get the desired shape with the current hair, waxing should be done every six to eight weeks.
- When you get your hair threaded, you use a thread to draw them out gently.